
Get ready for pure chocolate bliss! If you’re looking to truly impress your guests, these Molten Chocolate Lava Cakes are your secret weapon.
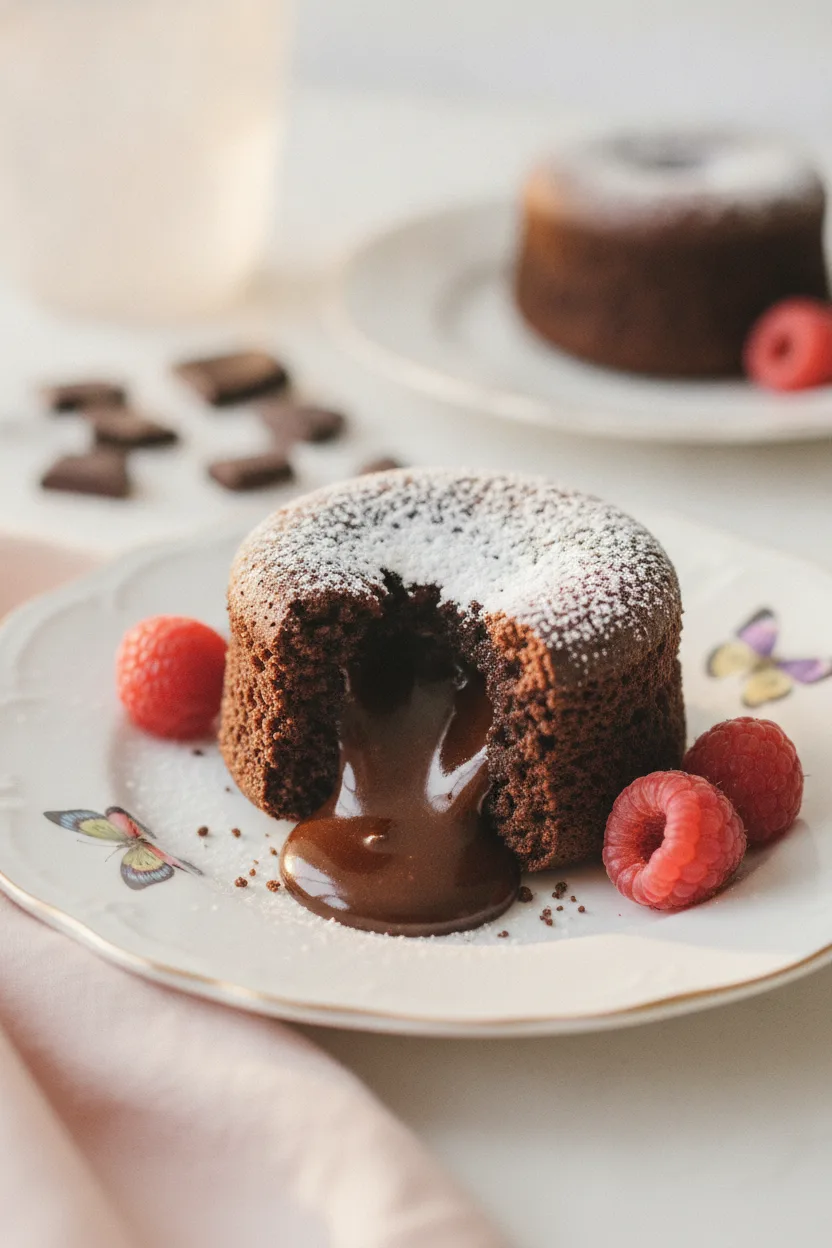
They boast a rich, deep chocolate flavor and a perfectly gooey, molten center that is simply irresistible.
This recipe is a carefully tested foolproof guide, ensuring that even if you’re new to baking, you’ll achieve that coveted ‘restaurant-quality’ result with confidence.
Prepare to be amazed by how easy it is to create such a decadent dessert. Let’s dive into the magic!
Quick Overview: Your Path to Perfect Lava Cakes
Get ready to impress! This section provides a lightning-fast guide to our decadent chocolate lava cakes, ensuring you can visualize the process and gather your essentials with ease.
Key Facts
Prep Time: 15 minutes
Cook Time: 6-8 minutes
Servings: 6 cakes
Oven Temperature: 450°F (232°C)
How to Make It in a Nutshell
- Preheat oven and prepare six ramekins.
- Melt chocolate and butter together until smooth.
- Whisk eggs, yolks, sugar, and salt until thick and pale.
- Gently fold chocolate and flour into the egg mixture.
- Divide batter into ramekins and bake for 6-8 minutes.
With these key details and steps at your fingertips, you’re well on your way to mastering these molten chocolate delights.
Mastering the Molten Magic: Expert Tips for Lava Cake Perfection
Achieving that perfect, restaurant-quality molten chocolate center isn’t just about luck; it’s about understanding a few key techniques and the science behind them. These tips will help you conquer the common pitfalls and ensure your lava cakes are a decadent success every time.
The Critical Role of Chocolate Quality and Type
The foundation of any great lava cake is, undoubtedly, the chocolate. For the best flavor and that signature molten center, opt for high-quality bittersweet or semi-sweet chocolate. The percentage of cacao matters; aim for something in the 60-70% range.
Why? Higher cacao content means more cocoa solids and less sugar, leading to a deeper chocolate flavor that isn’t cloyingly sweet. It also melts more smoothly and reliably, which is crucial for achieving that luxurious, gooey texture. Using a good quality chocolate ensures a rich, intense flavor that will truly impress. For other decadent chocolate creations, explore these recipes: Pistachio Chocolate Bar, Dark Chocolate Bark with Sea Salt, and White Chocolate Cranberry Fudge.
Mastering the Bake: The Science Behind the Gooey Center
The magic of a lava cake lies in the contrast between the set cake edges and the warm, liquid center. This delicate balance is achieved through precise baking. A very hot oven, specifically 450°F (232°C) as called for in this recipe, is essential. This high heat quickly sets the exterior of the cake while leaving the interior still molten.
The baking time is equally critical, typically only 6 to 8 minutes. Overbaking will cook the center through, resulting in a standard chocolate cake rather than a lava cake. Underbaking means the center might be too liquid and could spill out before serving. The eggs and flour play a vital role here: eggs provide richness and structure, while a small amount of flour helps create that cake-like exterior. Too much flour, or overmixing, can develop gluten and lead to a tougher cake, so gentle folding is key.
Room Temperature Eggs: The Unsung Hero
Using room temperature eggs might seem like a minor detail, but it makes a significant difference in the final texture of your lava cakes. Cold eggs can cause the melted chocolate to seize or solidify when combined, resulting in a lumpy batter and an uneven texture.
Furthermore, room temperature eggs emulsify much better with sugar and other ingredients. This creates a smoother, lighter batter that bakes up more evenly and contributes to that desirable tender crumb.
Ensure your eggs are at room temperature. Cold eggs can seize the melted chocolate, leading to a less smooth batter and potentially affecting the final texture.
Beyond Ramekins: Creative Baking Vessel Alternatives
While ramekins are the classic choice for lava cakes, you’re not limited to them! Muffin tins are an excellent alternative, and they often bake a bit faster due to their metal construction and smaller individual portions. Ensure you generously butter and flour them to prevent sticking.
Other small oven-safe bowls or even sturdy mason jars can also work. The key is to understand that different materials conduct heat differently. Thicker ceramic or glass will bake slower than thin metal. Always adjust your baking time based on the vessel you use, and keep a close eye on the cakes as they bake. For inspiration on using muffin tins in other recipes, check out our Crumbl Cookies, recipes using cupcake liners, and Pumpkin Spice Cinnamon Rolls.
By understanding these critical elements, you’re well on your way to baking consistently perfect lava cakes that will delight any dessert lover.
Let’s Bake Your Molten Masterpiece!
Now that you’re armed with the knowledge to achieve molten chocolate perfection, it’s time to bring these decadent cakes to life. Follow these straightforward steps, and you’ll be well on your way to impressing your guests (or simply indulging yourself!) with a truly spectacular dessert. Remember, precision and attention to detail are your best friends here.
Step 1: Prep Your Station
The foundation of any great bake starts with preparation. Preheat your oven to a blazing 450°F (232°C). This high heat is crucial for achieving that signature lava center. Next, thoroughly butter and lightly flour six 4- to 5-ounce ramekins. This ensures your delicate cakes will release cleanly. Arrange the prepped ramekins on a sturdy baking sheet, ready for their delicious batter.
Step 1: Melt the Chocolate and Butter
For the heart of your lava cake – that intensely rich chocolate flavor – we’ll melt together 6 ounces (168g) of chopped bittersweet chocolate and ½ cup (113g) of unsalted butter. The double boiler method is ideal for gentle, even melting: place a heatproof bowl over a saucepan of simmering water, ensuring the bottom of the bowl doesn’t touch the water. Stir until completely smooth. If you’re short on time, you can use a microwave, heating in 30-second intervals and stirring between each until just melted. Be careful not to scorch the chocolate!
Step 3: Whip Up the Egg Mixture
In a separate large bowl, combine 2 large eggs, 2 large egg yolks, ¼ cup (50g) of granulated sugar, and ⅛ teaspoon of salt. Using an electric mixer on medium speed, whip this mixture for about 2-3 minutes. You’re looking for a transformation: it should become noticeably thick, pale yellow, and significantly increased in volume. This aeration is key to the cake’s delicate texture. Remember to use room temperature eggs for the smoothest batter and best results; you can find out why in the ‘Expert Tips’ section.
Step 4: Combine Wet and Dry
Now, it’s time to bring the components together. Gently fold the luscious, melted chocolate-butter mixture into the airy egg mixture. Once just combined, carefully fold in the 2 tablespoons of all-purpose flour. The key here is to do not overmix. Overworking the flour can develop gluten, leading to a tougher cake. A gentle hand ensures a tender crumb.
Step 5: Fill Your Vessels
Carefully divide the rich, glossy batter evenly among the six prepared ramekins. Filling them about two-thirds to three-quarters full is usually sufficient, leaving a little room for expansion.
Step 6: The Optional Water Bath
For an extra layer of insurance against cracking and to promote incredibly even baking, consider a water bath. Once the ramekins are on the baking sheet and in the preheated oven, carefully pour about 1 cup of hot water into the baking sheet, around the ramekins. This creates a humid environment. While optional, it’s a technique favored by many for a more tender finish. Learn more about its benefits in the ‘Expert Tips’ section.
Step 7: Bake to Perfection
This is the most critical step! Bake for exactly 6 to 8 minutes. You’re looking for the edges of the cakes to be set and slightly puffed, while the center should remain visibly soft and jiggly. Baking time is paramount to achieving that molten core; watch them closely, as ovens can vary. Overbaking will turn your lava cake into a regular chocolate cake, so precision is key. Mastering this bake is the ultimate goal – consult ‘The Science Behind the Gooey Center’ in Expert Tips for further guidance.
Step 8: A Moment’s Rest
Once they’re baked to perfection, carefully remove the baking sheet from the oven. Let the ramekins rest on the baking sheet for just 1 minute. This brief pause allows the cakes to firm up slightly, making them easier to unmold without collapsing.
Step 9: The Grand Unveiling
The moment of truth! To unmold, place a small dessert plate upside down over the top of one ramekin. With confidence and a swift motion, invert the ramekin and plate together. Let it sit for about 10 seconds, then gently lift off the ramekin. Your perfectly formed lava cake, ready to be revealed, should slide out smoothly.
Step 10: Serve and Enjoy!
These molten chocolate masterpieces are best enjoyed immediately while the center is still warm and gooey. For an extra touch of elegance, you can dust them with powdered sugar, add a few fresh berries, or pair them with a scoop of vanilla ice cream or a dollop of whipped cream. Find more delightful serving ideas in the FAQ section to elevate your dessert experience.
With these steps, you’re ready to create a show-stopping dessert. Enjoy the process and the incredible result!
What is the secret to a good lava cake?
The secret lies in using quality chocolate, not overmixing the batter, and most importantly, precise baking time – aiming for set edges with a jiggly, molten center.
What is the best chocolate for lava cake?
Bittersweet chocolate (around 60-70% cacao) is ideal for its rich flavor and ability to melt into a gooey center without being overly sweet.
How to make a chocolate lava cake easy?
This recipe simplifies the process by using a straightforward method for melting chocolate and clear instructions for achieving the perfect gooey center, even for beginners.
Is molten chocolate cake the same as lava cake?
Yes, molten chocolate cake and lava cake are essentially the same dessert, referring to a small chocolate cake with a warm, liquid chocolate center.
Can I make this lava cake recipe ahead of time?
You can prepare the batter and refrigerate the filled ramekins for up to 2 days. Bring them to room temperature before baking, though the iconic lava center might be slightly firmer.
What if I don’t have ramekins?
You can use a muffin tin; they bake faster, so start checking for doneness after 5 minutes. Small oven-safe bowls or mason jars also work.
What are some delicious serving suggestions for lava cakes?
Serve warm with a scoop of vanilla ice cream, a dollop of whipped cream, fresh berries, a drizzle of hot fudge, or a dusting of powdered sugar.
Did You Bake These Molten Masterpieces?
There’s no greater reward than seeing you bring these recipes to life in your own kitchen! If you’ve tried these decadent lava cakes, I’d love to hear about your experience.
Your feedback and photos mean the world and help other home cooks feel inspired and confident. Please share your thoughts and star rating below!
Share your creations and connect with fellow baking enthusiasts on Pinterest and Facebook!
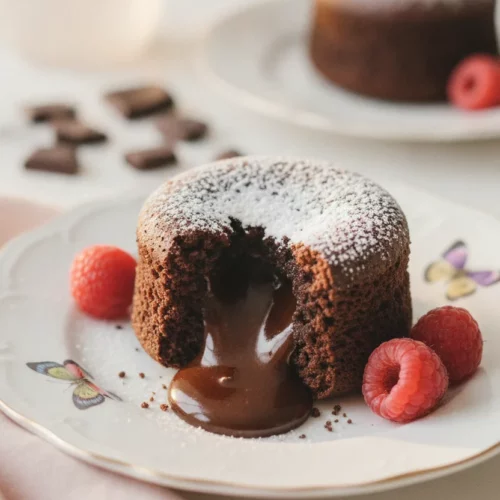
Molten Chocolate Lava Cakes
Equipment
- Ramekins
- Baking sheet
- Saucepan
- Heatproof bowl
- Electric mixer
- small dessert plate
Ingredients
Key Facts
- 15 minutes Prep Time
- 6-8 minutes Cook Time
- 6 cakes Servings
- 450 °F Oven Temperature (232°C)
Chocolate and Butter
- 6 ounces (168g) chopped bittersweet chocolate
- 1/2 cup (113g) unsalted butter
Egg Mixture
- 2 large eggs room temperature
- 2 large egg yolks room temperature
- 1/4 cup (50g) granulated sugar
- 1/8 teaspoon salt
Wet and Dry Ingredients
- 2 tablespoons all-purpose flour
Optional Water Bath
- 1 cup hot water for water bath
Instructions
Step 1: Prep Your Station
- Preheat your oven to a blazing 450°F (232°C). This high heat is crucial for achieving that signature lava center. Next, thoroughly butter and lightly flour six 4- to 5-ounce ramekins. This ensures your delicate cakes will release cleanly. Arrange the prepped ramekins on a sturdy baking sheet, ready for their delicious batter.
Step 2: Melt the Chocolate and Butter
- For the heart of your lava cake – that intensely rich chocolate flavor – we’ll melt together 6 ounces (168g) of chopped bittersweet chocolate and ½ cup (113g) of unsalted butter. The double boiler method is ideal for gentle, even melting: place a heatproof bowl over a saucepan of simmering water, ensuring the bottom of the bowl doesn't touch the water. Stir until completely smooth. If you're short on time, you can use a microwave, heating in 30-second intervals and stirring between each until just melted. Be careful not to scorch the chocolate!
Step 3: Whip Up the Egg Mixture
- In a separate large bowl, combine 2 large eggs, 2 large egg yolks, ¼ cup (50g) of granulated sugar, and ⅛ teaspoon of salt. Using an electric mixer on medium speed, whip this mixture for about 2-3 minutes. You’re looking for a transformation: it should become noticeably thick, pale yellow, and significantly increased in volume. This aeration is key to the cake’s delicate texture. Remember to use room temperature eggs for the smoothest batter and best results; you can find out why in the 'Expert Tips' section.
Step 4: Combine Wet and Dry
- Now, it's time to bring the components together. Gently fold the luscious, melted chocolate-butter mixture into the airy egg mixture. Once just combined, carefully fold in the 2 tablespoons of all-purpose flour. The key here is to do not overmix. Overworking the flour can develop gluten, leading to a tougher cake. A gentle hand ensures a tender crumb.
Step 5: Fill Your Vessels
- Carefully divide the rich, glossy batter evenly among the six prepared ramekins. Filling them about two-thirds to three-quarters full is usually sufficient, leaving a little room for expansion.
Step 6: The Optional Water Bath
- For an extra layer of insurance against cracking and to promote incredibly even baking, consider a water bath. Once the ramekins are on the baking sheet and in the preheated oven, carefully pour about 1 cup of hot water into the baking sheet, around the ramekins. This creates a humid environment. While optional, it's a technique favored by many for a more tender finish. Learn more about its benefits in the 'Expert Tips' section.
Step 7: Bake to Perfection
- This is the most critical step! Bake for exactly 6 to 8 minutes. You're looking for the edges of the cakes to be set and slightly puffed, while the center should remain visibly soft and jiggly. Baking time is paramount to achieving that molten core; watch them closely, as ovens can vary. Overbaking will turn your lava cake into a regular chocolate cake, so precision is key. Mastering this bake is the ultimate goal – consult 'The Science Behind the Gooey Center' in Expert Tips for further guidance.
Step 8: A Moment's Rest
- Once they’re baked to perfection, carefully remove the baking sheet from the oven. Let the ramekins rest on the baking sheet for just 1 minute. This brief pause allows the cakes to firm up slightly, making them easier to unmold without collapsing.
Step 9: The Grand Unveiling
- The moment of truth! To unmold, place a small dessert plate upside down over the top of one ramekin. With confidence and a swift motion, invert the ramekin and plate together. Let it sit for about 10 seconds, then gently lift off the ramekin. Your perfectly formed lava cake, ready to be revealed, should slide out smoothly.
Step 10: Serve and Enjoy!
- These molten chocolate masterpieces are best enjoyed immediately while the center is still warm and gooey. For an extra touch of elegance, you can dust them with powdered sugar, add a few fresh berries, or pair them with a scoop of vanilla ice cream or a dollop of whipped cream. Find more delightful serving ideas in the FAQ section to elevate your dessert experience.
- With these steps, you're ready to create a show-stopping dessert. Enjoy the process and the incredible result!