
Imagine a dessert that perfectly balances rich, creamy white chocolate with a vibrant swirl of tart raspberry, all nestled within a crisp chocolate cookie crust. This isn’t just any dessert; it’s a showstopper that promises to impress, a true indulgence that feels like it came straight from a gourmet bakery.
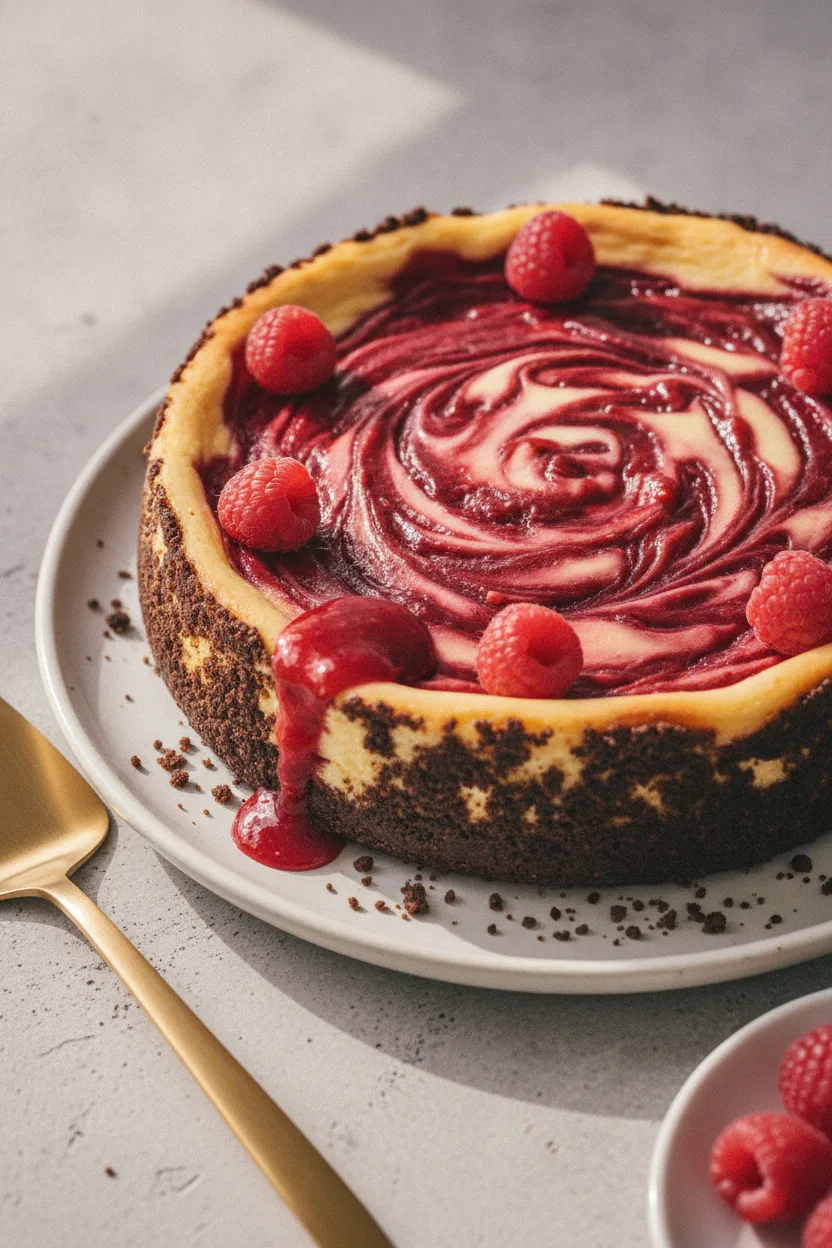
We know you appreciate a recipe that delivers on its promise, especially when you’re looking to create something truly special for guests. This White Chocolate Raspberry Cheesecake is designed to be that impressive, yet achievable, centerpiece.
You want to create memorable moments through food, and this recipe is crafted to help you do just that, with results that are as reliable as they are delicious.
The Perfect Balance of Sweet and Tart
Prepare your senses for an exquisite experience. The foundation is a buttery, crisp chocolate cookie crust that offers a delightful textural contrast. Above this lies a decadently smooth white chocolate cheesecake filling, so creamy it practically melts in your mouth. Throughout this silken canvas, a jewel-toned raspberry swirl weaves its way, providing a burst of bright, tart flavor that cuts through the richness perfectly. It’s this harmonious blend of sweet, creamy, and tart that makes each bite an adventure.
This isn’t just a cheesecake; it’s a meticulously crafted dessert that delivers that sought-after restaurant-quality elegance right to your own table. You’ll feel a genuine sense of accomplishment serving a dessert this stunning and delicious.
A Recipe You Can Trust
We understand that your time is valuable, and the last thing you want is a baking project that ends in disappointment. That’s why this White Chocolate Raspberry Cheesecake recipe has been thoroughly tested and refined to ensure success, even for those who might feel a little hesitant about making cheesecake.
We’ve focused on clear, precise instructions and will explain the ‘why’ behind each crucial step. Understanding the techniques, like the importance of room-temperature ingredients and the magic of a water bath, will not only help you achieve a flawless result this time but will also build your confidence for future baking endeavors.
Quick Overview: Your White Chocolate Raspberry Cheesecake
Want a quick look at this decadent dessert? Here’s the essential information you need at a glance, followed by the simplified steps to bring this masterpiece to life.
At a Glance
- Prep time: 30 minutes
- Cook time: 1 hour 10 minutes
- Servings: 16
- Difficulty: Easy to Medium
How It Comes Together
- Prepare the chocolate cookie crust.
- Make the vibrant raspberry sauce.
- Create the creamy white chocolate filling.
- Assemble, swirl, and bake the cheesecake.
- Allow to cool slowly, then chill thoroughly.
Ready to dive into the details? Let’s break down each step to ensure your success.
The Science Behind a Perfect Cheesecake: Why It Works
Achieving that perfect, silky-smooth cheesecake texture isn’t just about good ingredients; it’s about understanding the science behind the bake. For a truly professional result, paying attention to a few key techniques will elevate your cheesecake from good to absolutely divine. These steps ensure a creamy, dense, and crack-free dessert every time.
The Magic of Room Temperature Ingredients
The foundation of a flawless cheesecake batter lies in the temperature of its core components: cream cheese, eggs, and sour cream. When these ingredients are at room temperature, they emulsify much more readily. Softened cream cheese blends seamlessly, eliminating the lumps that can plague cheesecake. Room temperature eggs incorporate evenly into the batter, contributing to a richer texture without deflating the mixture. Similarly, room-temperature sour cream ensures a homogenous batter, which is crucial for even cooking and a consistently smooth consistency.
Skipping this step and using cold ingredients is a common pitfall. Cold cream cheese resists mixing, leading to a lumpy batter, while cold eggs can shock the cream cheese, causing the mixture to curdle. The result is a cheesecake that is uneven in texture and potentially prone to cracking.
Why a Water Bath is Your Cheesecake’s Best Friend
You might have seen recipes calling for a water bath, and it’s not just an extra step for the sake of it – it’s essential for cheesecake perfection. A water bath, also known as a bain-marie, involves wrapping your springform pan in foil and placing it in a larger baking pan filled with hot water. This setup creates a gentle, humid baking environment.
The steam generated by the water bath ensures that the cheesecake bakes evenly and slowly. This controlled environment prevents the edges from overbaking before the center is set and, crucially, minimizes the rapid expansion and contraction of the batter that causes cracks. The result is a cheesecake with a uniformly creamy, dense texture that is incredibly smooth, much like the professional versions you’d find in a fine bakery.
The Art of Slow Cooling
Once your cheesecake is baked to perfection, the cooling process is just as critical as the baking itself. Sudden temperature changes are the arch-nemesis of a crack-free cheesecake. Removing a hot cheesecake from the oven and placing it directly in a cool room can shock the delicate structure, leading to fissures on the surface.
To prevent this, the slow cooling method is employed. After baking, turn off the oven but leave the cheesecake inside with the oven door cracked open slightly. This gradual decrease in temperature allows the cheesecake to set gently, avoiding the drastic shifts that cause cracks. Following this with complete cooling at room temperature, and then a long chill in the refrigerator, ensures the cheesecake solidifies properly, resulting in that signature dense, smooth texture without any unsightly cracks. Mastering these ‘why’s’ will guarantee a show-stopping dessert.
Step-by-Step: Crafting Your Masterpiece
Now that we understand the ‘why’ behind a perfect cheesecake, let’s dive into the satisfying process of creating this White Chocolate Raspberry Cheesecake. Follow these clear steps to bring your dessert dreams to life.
Step 1: Preheat and Build the Foundation
First things first, let’s preheat your oven to 325°F (165°C). This moderate temperature is key to ensuring the cheesecake bakes evenly without scorching.
Next, prepare the crust. In a medium bowl, combine 1 cup of chocolate cookie crumbs, 1/4 cup of melted butter, and 3 tablespoons of white sugar. Mix until the crumbs are evenly moistened. Press this mixture firmly and evenly into the bottom of a 9-inch springform pan. A firm, even crust is essential for structure and prevents a soggy bottom later on.
Step 2: Crafting the Vibrant Raspberry Swirl
To create the beautiful raspberry swirl, we’ll start by making a vibrant sauce. In a saucepan, combine 1 (10 ounce) package of frozen raspberries, 1/2 cup of water, 2 tablespoons of white sugar, and 2 teaspoons of cornstarch. Bring this mixture to a boil over medium heat, then reduce the heat and let it simmer for about 5 minutes, stirring occasionally, until the sauce has thickened.
For a truly professional and smooth swirl, strain the sauce through a fine-mesh sieve to remove any seeds. This step ensures your raspberry ribbons are as elegant as they are delicious. Set this vibrant sauce aside to cool slightly.
Step 3: Melting the White Chocolate Bliss
Now for the star of our filling: the white chocolate! In a heatproof bowl, combine 2 cups of white chocolate chips and 1/2 cup of half-and-half cream. You can melt these together using a double boiler method, setting the bowl over a saucepan of simmering water, stirring until smooth. Alternatively, use your microwave on short intervals, stirring between each burst, until the chocolate is fully melted and beautifully smooth. Be patient with white chocolate; it can scorch easily.
Step 4: Creating the Creamy Cheesecake Batter
In a large bowl, begin by beating 3 (8 ounce) packages of softened, room temperature cream cheese with 1/2 cup of white sugar until the mixture is completely smooth and creamy. This is where those room temperature ingredients truly shine, preventing lumps. If you haven’t already, ensure your 3 large eggs are also at room temperature.
Beat in the eggs one at a time, making sure each egg is fully incorporated before adding the next. This gradual addition helps maintain a smooth, stable batter. Stir in 1 teaspoon of vanilla extract and the melted white chocolate mixture until everything is just combined. Avoid overmixing at this stage, as it can incorporate too much air, potentially leading to cracks.
Step 5: Assembling and Swirling Perfection
It’s time to bring it all together. Pour about half of the creamy cheesecake batter evenly over the prepared crust in your springform pan. Next, spoon 3 tablespoons of the reserved raspberry sauce over this layer of batter.
Gently pour the remaining cheesecake batter on top. Dollop the remaining 3 tablespoons of raspberry sauce over this final layer. To create that signature marbled look, insert the tip of a knife or a skewer into the batter and gently swirl. Remember, the goal is a beautiful pattern, so don’t over-swirl, which can muddy the colors.
Step 6: Bake to Golden Perfection (and Cool Slowly!)
Place the cheesecake in the preheated 325°F (165°C) oven. Bake for approximately 55 to 60 minutes. You’re looking for the edges of the cheesecake to be set, while the center should still have a slight jiggle. This indicates it’s perfectly baked and will continue to set as it cools.
This is a critical step for preventing cracks: once baking is complete, turn off the oven. Crack the oven door slightly open and allow the cheesecake to cool inside the oven for 1 hour. This gradual temperature change is vital, as detailed in our ‘Expert Tips’ section, helping to avoid the dreaded cheesecake cracks.
Step 7: Chill, Unmold, and Serve
After its hour-long cool-down in the oven, remove the cheesecake and let it cool completely at room temperature on a wire rack. Once it has reached room temperature, cover the pan tightly with plastic wrap. Refrigerate for at least 8 hours, or preferably overnight. This chilling period is non-negotiable; it allows the cheesecake to fully set and develop its dense, creamy texture.
When ready to serve, carefully run a thin knife around the edge of the pan before releasing the springform side. This ensures a clean release and preserves the beautiful edges. Serve chilled, with any extra raspberry sauce on the side if desired, and prepare for compliments.
With these steps completed, your masterpiece is ready to be enjoyed. Now, let’s explore some creative ways to elevate it further.
Troubleshooting Common Cheesecake Woes
Even the most experienced bakers encounter occasional cheesecake mishaps. Don’t let a minor issue deter you! Understanding why these problems occur is the first step to achieving that perfect, decadent dessert every time.
Dealing with Cracks
A cracked cheesecake can be disheartening, but it’s usually a sign of overbaking or a too-rapid temperature change. When the cheesecake bakes too long, the proteins in the eggs overcook and expand, leading to fissures as it cools. Similarly, a sudden blast of cold air can cause the delicate structure to contract unevenly. This is precisely why a water bath and a slow cooling process are so critical. These methods ensure gentle, even heat distribution, preventing the batter from cooking too quickly and allowing it to settle smoothly as it cools.
When the Crust is Soggy
A soggy bottom crust can ruin the textural contrast we’re aiming for. This often happens when there’s too much moisture either from the filling seeping down or because the crust itself wasn’t properly set. To combat this, ensure your crust ingredients are well-mixed and pressed firmly into the pan. A crucial step, especially with a crumb crust like ours, is to pre-bake the crust for about 10 minutes. This toasts the crumbs and helps create a barrier that resists moisture from the filling.
Why the Center Sank
A sunken cheesecake center is typically a tell-tale sign of underbaking. If the center isn’t set, it won’t have the structural integrity to support itself as it cools, leading to a collapse. You’re looking for the edges to be set and firm, while the center should still have a slight jiggle, almost like set Jell-O. Another culprit can be opening the oven door too early during the cooling phase, allowing too much heat to escape too quickly. Always follow the recommended slow cooling process in the oven to allow the cheesecake to gradually stabilize.
By understanding these common issues and their solutions, you’re well on your way to cheesecake perfection. Now, let’s explore some creative ways to elevate your dessert.
Creative Twists and Delicious Variations
While this White Chocolate Raspberry Cheesecake is exquisite as is, there’s always room to play! Caitlin, you’ll love these ideas for making it uniquely yours.
Beyond Chocolate Crumbs
The foundation of your cheesecake can be just as exciting as the filling. Instead of chocolate cookie crumbs, try a crust made from crushed Oreo cookies, Teddy Grahams, or even simple Maria cookies. For a shortcut, consider using a good quality seedless raspberry jam in place of the homemade sauce if you’re short on time.
Chocolate Swaps and Garnishes
White chocolate offers a delicate sweetness, but you can easily pivot to other chocolate varieties. Using milk chocolate chips will lend a richer, more traditional chocolate flavor. For a stunning presentation, consider garnishing your cheesecake with elegant white chocolate curls – a simple technique that adds a professional touch. A scattering of fresh raspberries also provides a beautiful pop of color and freshness.
Mini Cheesecakes or Pie Pan Adaptations
Looking for individual servings or a different format? This recipe is wonderfully adaptable. You can bake it in muffin tins lined with paper liners to create delightful mini cheesecakes, perfect for parties. Alternatively, a standard 9-inch pie pan can be used, though you’ll want to keep a close eye on the baking time as it may cook slightly faster.
Ready to get creative? Let’s explore how to make your cheesecake exactly how you like it.
Is the water bath really necessary for cheesecake?
Yes, a water bath creates a humid environment, promoting even baking, preventing cracks, and ensuring a silky-smooth texture for your cheesecake.
Can this cheesecake be made ahead of time?
Absolutely! This cheesecake can be made ahead and refrigerated for at least 8 hours or overnight. It can also be frozen (without whipped cream) until needed.
How do I get a beautiful raspberry swirl without it looking messy?
Dollop the raspberry sauce onto the batter and gently swirl with a skewer or knife, being careful not to over-mix. Strain the sauce first for a smoother consistency.
My cheesecake crust is soggy, what did I do wrong?
To prevent a soggy crust, ensure you’re pressing it firmly into the pan and consider pre-baking it for a few minutes before adding the filling.
Can I make this cheesecake in a different pan, like a pie pan?
Yes, this recipe can be adapted for a 9-inch pie pan, though the baking time might need adjustment.
Did You Bake This Decadent Cheesecake?
We absolutely love to see your culinary creations! Sharing your experience helps inspire others and fosters a wonderful community here at Meal Delights.
Share Your Experience!
Did you bake this decadent White Chocolate Raspberry Cheesecake? We’d be thrilled to hear about your results, see any photos you’re proud of, or learn about any delicious variations you experimented with. Please share your experience in the comments below and consider leaving a star rating for the recipe!
For more dessert inspiration, check out our recipes for Crumbl Cookies, Chocolate Chip Banana Bread, and a delightful Chocolate Raspberry Tart!
Connect with us on Pinterest and Facebook to stay updated on all our delicious recipes and baking tips!

White Chocolate Raspberry Cheesecake
Equipment
- 9-inch springform pan
- Saucepan
- Heatproof bowl
- Medium bowl
- Large bowl
- Fine-mesh sieve
- knife or skewer
- Wire rack
Ingredients
For the Crust
- 1 cup chocolate cookie crumbs
- 1/4 cup melted butter
- 3 tablespoons white sugar
For the Raspberry Swirl
- 1 (10 ounce) package frozen raspberries
- 1/2 cup water
- 2 tablespoons white sugar
- 2 teaspoons cornstarch
For the White Chocolate Filling
- 2 cups white chocolate chips
- 1/2 cup half-and-half cream
- 3 (8 ounce) packages softened cream cheese room temperature
- 1/2 cup white sugar
- 3 large eggs room temperature
- 1 teaspoon vanilla extract
- 3 tablespoons raspberry sauce reserved
Instructions
Preheat and Build the Foundation
- Preheat your oven to 325°F (165°C).
- In a medium bowl, combine 1 cup of chocolate cookie crumbs, 1/4 cup of melted butter, and 3 tablespoons of white sugar. Mix until the crumbs are evenly moistened. Press this mixture firmly and evenly into the bottom of a 9-inch springform pan.
Crafting the Vibrant Raspberry Swirl
- In a saucepan, combine 1 (10 ounce) package of frozen raspberries, 1/2 cup of water, 2 tablespoons of white sugar, and 2 teaspoons of cornstarch. Bring this mixture to a boil over medium heat, then reduce the heat and let it simmer for about 5 minutes, stirring occasionally, until the sauce has thickened.
- Strain the sauce through a fine-mesh sieve to remove any seeds. Set this vibrant sauce aside to cool slightly.
Melting the White Chocolate Bliss
- In a heatproof bowl, combine 2 cups of white chocolate chips and 1/2 cup of half-and-half cream. Melt these together using a double boiler method or in the microwave on short intervals, stirring until smooth. Be patient with white chocolate; it can scorch easily.
Creating the Creamy Cheesecake Batter
- In a large bowl, begin by beating 3 (8 ounce) packages of softened, room temperature cream cheese with 1/2 cup of white sugar until the mixture is completely smooth and creamy.
- Beat in the 3 large eggs one at a time, making sure each egg is fully incorporated before adding the next. Stir in 1 teaspoon of vanilla extract and the melted white chocolate mixture until everything is just combined. Avoid overmixing.
Assembling and Swirling Perfection
- Pour about half of the creamy cheesecake batter evenly over the prepared crust in your springform pan. Spoon 3 tablespoons of the reserved raspberry sauce over this layer of batter.
- Gently pour the remaining cheesecake batter on top. Dollop the remaining 3 tablespoons of raspberry sauce over this final layer. To create that signature marbled look, insert the tip of a knife or a skewer into the batter and gently swirl. Don't over-swirl.
Bake to Golden Perfection (and Cool Slowly!)
- Place the cheesecake in the preheated 325°F (165°C) oven. Bake for approximately 55 to 60 minutes, until the edges are set and the center has a slight jiggle.
- Once baking is complete, turn off the oven. Crack the oven door slightly open and allow the cheesecake to cool inside the oven for 1 hour.
Chill, Unmold, and Serve
- After its hour-long cool-down in the oven, remove the cheesecake and let it cool completely at room temperature on a wire rack. Once it has reached room temperature, cover the pan tightly with plastic wrap. Refrigerate for at least 8 hours, or preferably overnight.
- When ready to serve, carefully run a thin knife around the edge of the pan before releasing the springform side. Serve chilled.